

Unlock Precision: Build Your DIY RTKDirect Reference Station Today!

Table of Contents
RTKDirect DIY Reference Station Setup Guide
In this comprehensive guide, we’ll take you through the process of establishing your own GPS RTKDirect server using cost-effective hardware options and reliable GPS receivers. Whether you’re interested in elevating the precision of your location-based applications, conducting accurate surveys, or delving into the world of DIY technology, this guide provides step-by-step instructions to assist you in creating your DIY RTKDirect reference station.
Note: This article does not contain financial advice nor does it consist of any endorsement of the RTKDirect project.
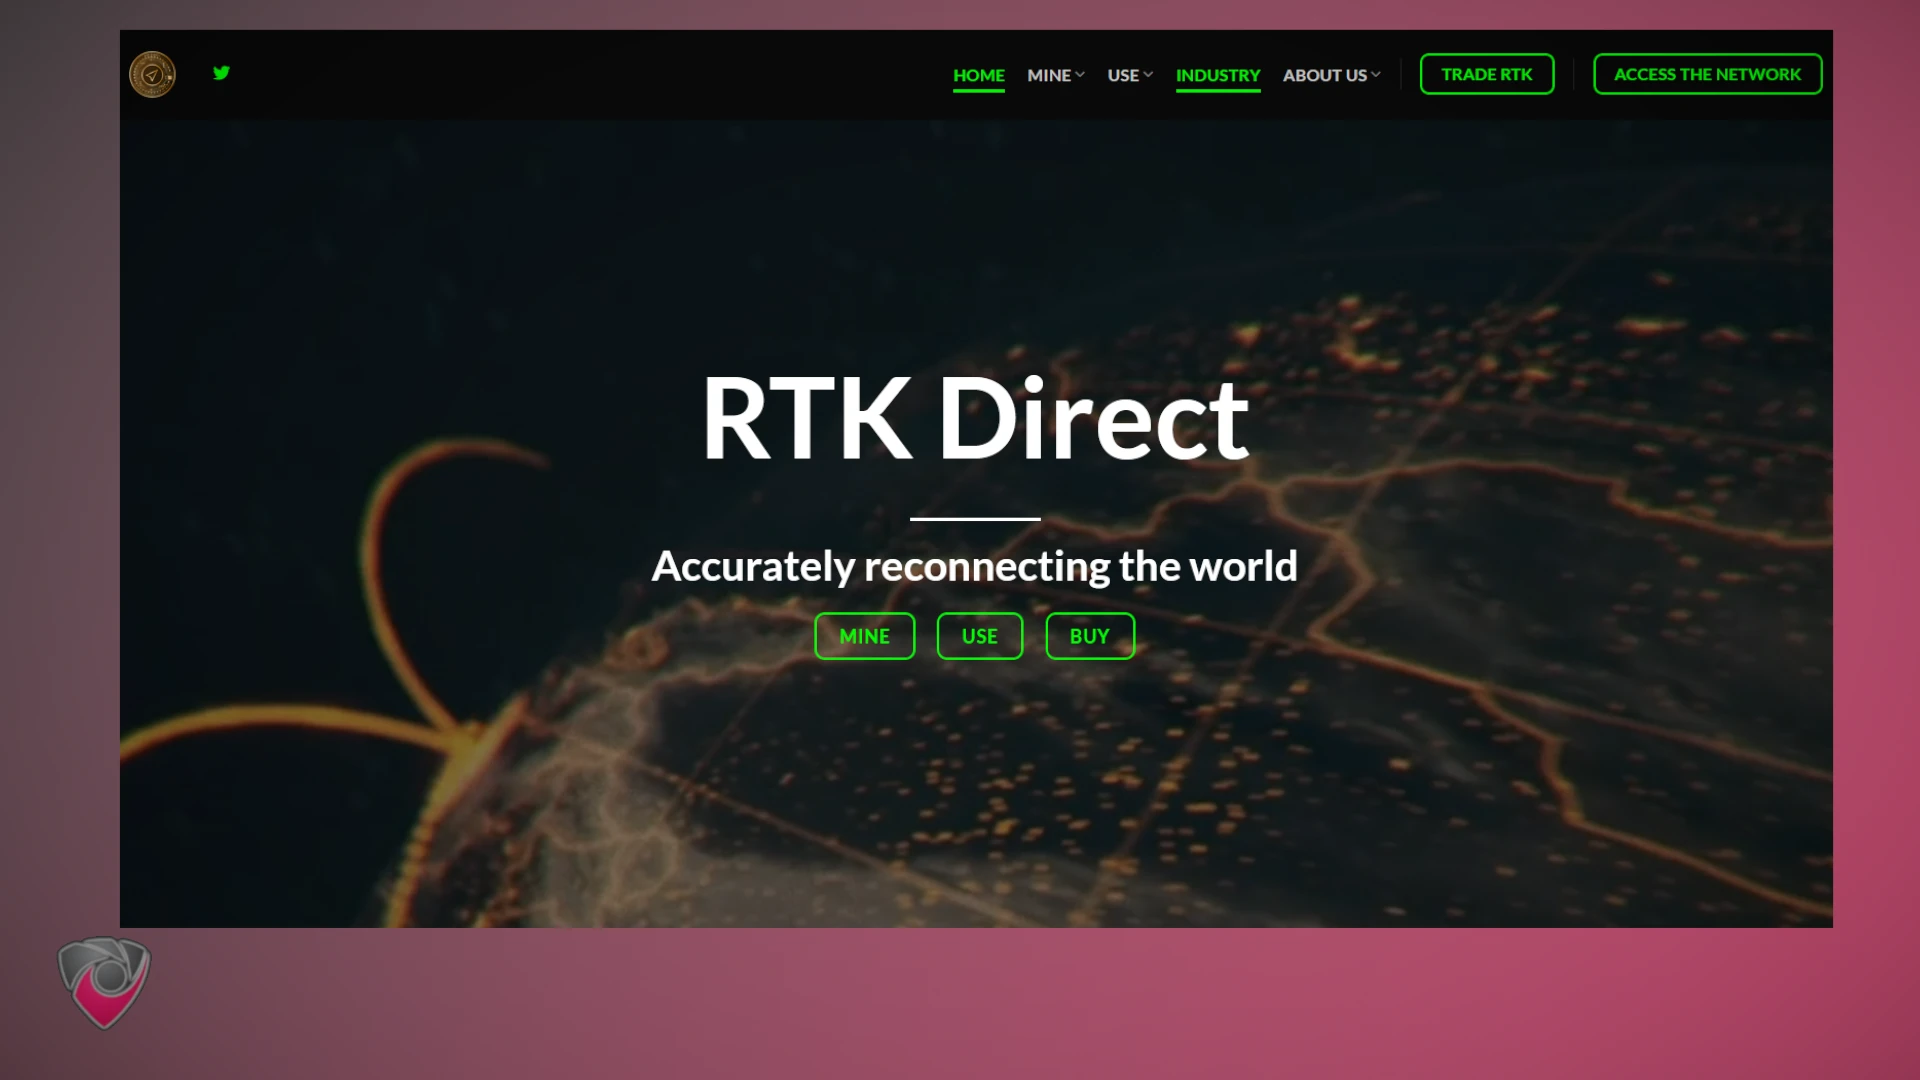
What is RTKDirect?: Advancing GNSS Correction Data
RTKDirect is an innovative platform that utilizes GNSS devices and correction data to build a decentralized network for precise positioning and navigation. It provides users with the opportunity to contribute to this network while earning rewards based on their data contributions.
Enhancing Your GNSS and RTK Setup
RTKDirect offers a fresh perspective on GNSS stations. Beyond achieving pinpoint accuracy, it’s about becoming part of a global network that benefits users worldwide. Discover the key considerations for setting up your station: from selecting the right equipment to optimizing antenna placement and ensuring reliable internet connectivity.
Key Considerations for Setup
When setting up your RTKDirect station, consider the following:
- Cost-Effective Hardware: Choose hardware options that are both effective and budget-friendly.
- Optimized Antenna Placement: Ensure your antenna is placed optimally for reliable signals.
- Internet Connectivity: Establish a robust internet connection for seamless data contributions.
RTKDirect Contribution and Rewards
At its core, RTKDirect not only improves accuracy but also acknowledges your contributions. Learn how your role in enabling specific RTCM3 messages and maintaining low latency translates into tangible rewards. RTKDirect’s approach ensures a fair distribution of rewards through blockchain technology, providing transparency in recognition.
RTKDirect Reward Calculation
Understanding RTKDirect’s GNSS Capabilities and Requirements
Exploring the GNSS capabilities of RTKDirect sheds light on the diverse channels and bands it supports. A broader range of bands and constellations translates to enhanced rewards within the network. For an in-depth understanding, refer to the insights shared in their official website .
Update rates, a crucial factor, cater differently to miners and RTK Rovers, who are the data consumers utilizing the RTKDirect service. Miners find stability with a rate of 1Hz, ensuring steady data contribution. In contrast, higher update rates like 10Hz, 20Hz, or even 100Hz predominantly serve RTK Rovers’ needs for real-time precision.
Addressing the notion of minimum required position accuracy, RTKDirect adopts a pragmatic approach. Straying from stringent demands, the system’s meticulous processing accurately determines device positions during validation steps, ensuring reliability without undue accuracy expectations.
Signal-to-Noise Ratio (SNR) and Signal Levels

Installed Antenna - doc.onocoy.com
Signal-to-Noise Ratio (SNR) and signal levels emerge as pivotal factors. SNR above 40 dBHz, preferably reaching around 45 dBHz, signifies optimal performance. Lower SNR values, stemming from factors like extended cables or antenna quality, can elevate code/carrier noise, potentially affecting measurement quality. Two fundamental principles guide this aspect:
- Ensuring an unobstructed 360-degree sky view for the antenna, ensuring unhindered signal access.
- Aiming for a secure and stable antenna mount to counteract vibrations and instability.
This comprehensive approach forms the bedrock of reliable and robust data contribution to the RTKDirect network.
Why DIY an RTKDirect Reference Station?
Creating your own DIY RTKDirect reference station offers several compelling advantages. Firstly, it provides a cost-effective solution, enabling you to save on setup expenses while achieving high precision in location-based applications. Secondly, the customization options allow you to tailor the hardware and software to your specific needs, enhancing flexibility and adaptability. Moreover, DIY setup empowers you with a deeper understanding of the technology, enabling you to troubleshoot and innovate. Lastly, contributing to the RTKDirect network not only improves your own accuracy but also lets you play a vital role in advancing global navigation systems while earning rewards for your data contributions.
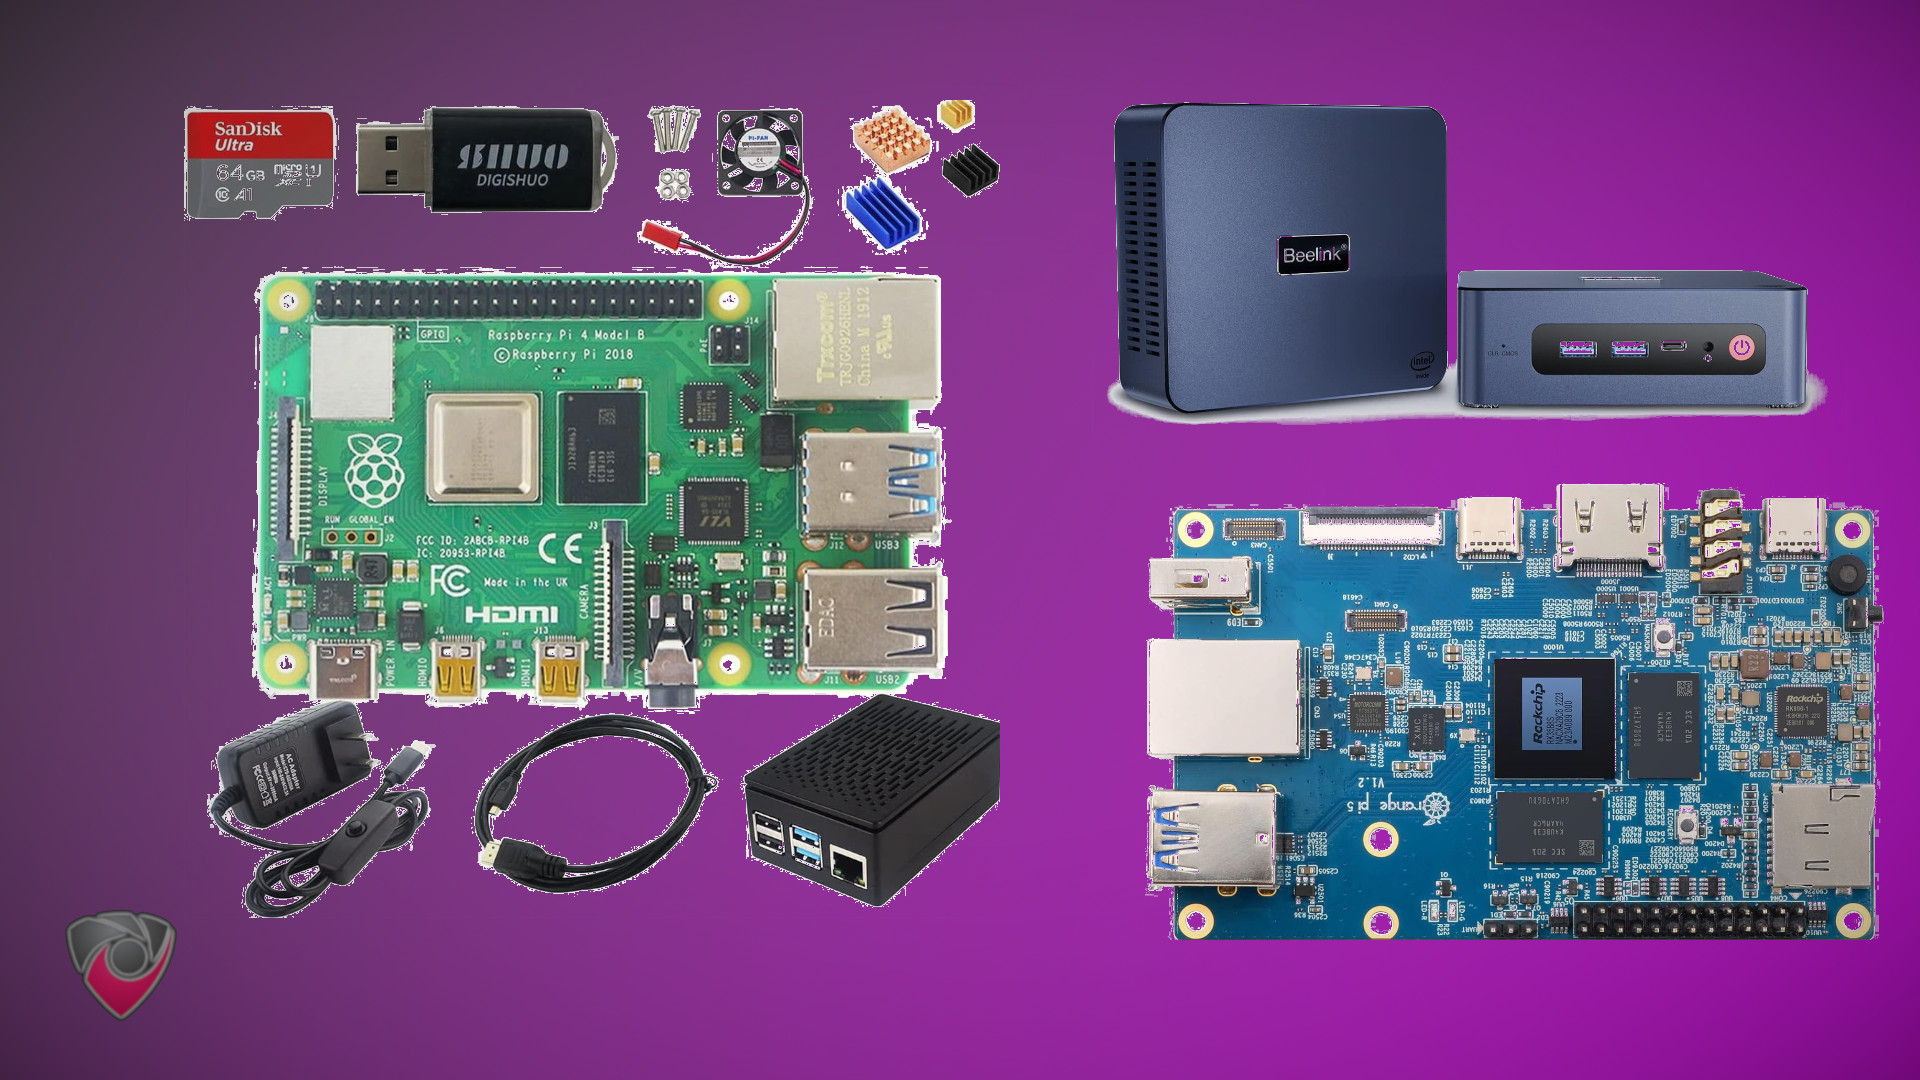
Hardware Requirements:
One of the following is required. We basically just need any efficient and low powered computer we can get our hands on that also runs Linux. Any Raspberry PI, Intel NUC, or similar will do. They don’t have to be all that powerful. However, we will recommend you have at least 32g-64g of flash-based storage (for longevity of the SSD). For this, we will be targeting a budget of around $50-$200 for compute hardware, but feel free to go higher if it suits your needs. Our power target is approximately 10w average.
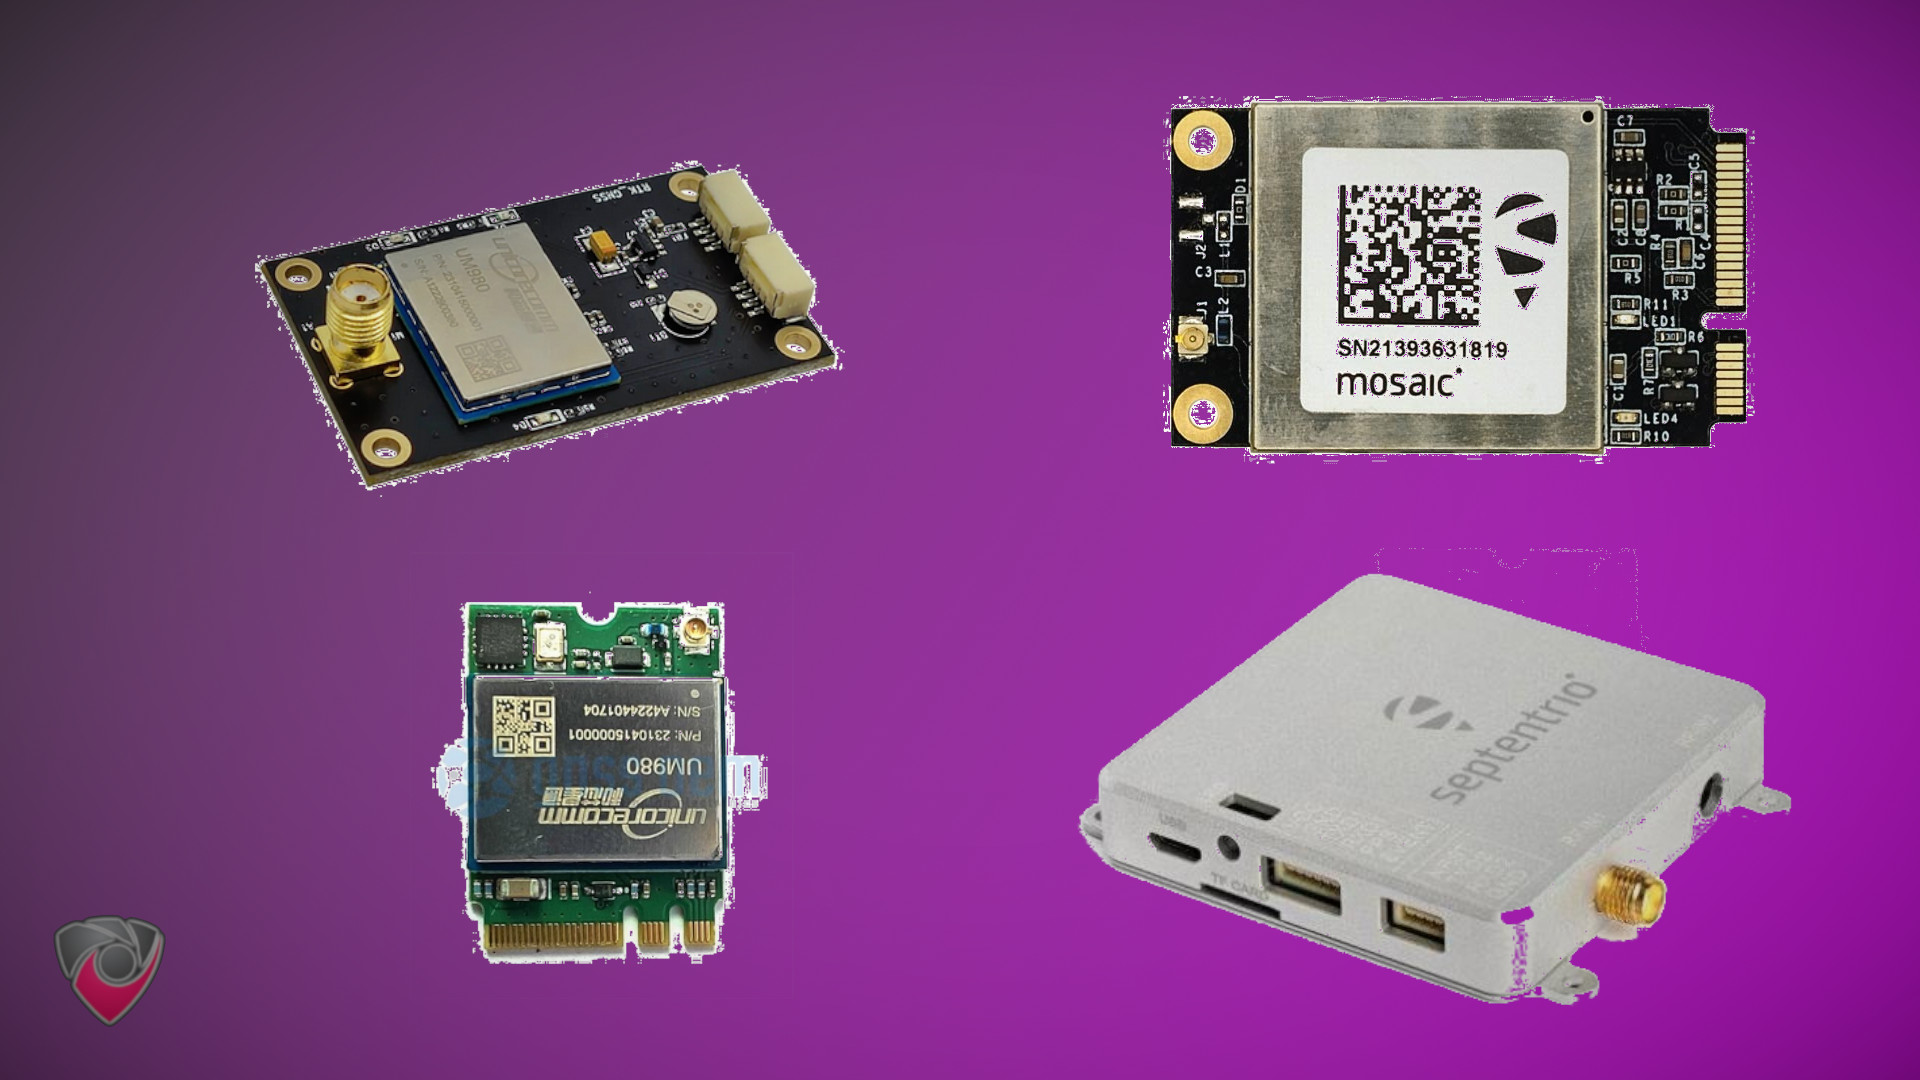
Recommended GPS Receivers DIY RTKDirect Deployments
There are many receivers on the market but at a bare minimum it must support RTCM (Radio Technical Commission for Maritime Services) and ideally have the ability to be hooked up to an antenna outside of the install location with 360 degree unobstructed view of the sky.
Recommended Antennas for RTKDirect
We’ve covered this in a more in depth guide about the Best GPS Base Station Antennas .

OS Installation:
We won’t go into the technical details of how to install an operating system here. However here are some great resources to get you started.
Raspbian:
Ubuntu:
- Install Ubuntu desktop
- Ubuntu Server - Basic installation
- Ubuntu Complete Beginner’s Guide: Download & Installing Ubuntu
RTK Direct Setup Instructions
Linux - Docker Container
1. Install Docker
Consult the following guides for more information on how to install docker
- https://www.digitalocean.com/community/tutorial-collections/how-to-install-and-use-docker
- https://docs.docker.com/engine/install/
- https://docs.docker.com/engine/install/ubuntu/
2. Run the Docker Container
Run our Docker container , ensuring that you provide the necessary environment variables and parameters:
docker run \
  -td \
  --restart unless-stopped \
  --name sosrtk \
  --device=/dev/<YOUR_USB_PORT> \
  -e USB_PORT=<YOUR_USB_PORT> \
  -e BAUD_RATE=<YOUR_SERIAL_BAUD_RATE> \
  -e DATA_BITS=<YOUR_SERIAL_DATA_BITS> \
  -e PARITY=<YOUR_SERIAL_PARITY> \
  -e STOP_BITS=<YOUR_SERIAL_STOP_BITS> \
  -e PORT_NUMBER=<YOUR_RTKLIB_PORT_NUMBER> \
  -e LAT=<OPTIONAL_YOUR_LATITUDE> \
  -e LONG=<OPTIONAL_YOUR_LONGITUDE> \
  -e ELEVATION=<OPTIONAL_YOUR_ELEVATION_FROM_SEA_LEVEL_IN_METERS> \
  -e INSTRUMENT=<OPTIONAL_YOUR_GPS_RECEIVER_DESCRIPTION> \
  -e ANTENNA=<OPTIONAL_YOUR_ANTENNA_DESCRIPTION> \
  simeononsecurity/docker-rtklib-onocoy-rtkdirect:latest
Ensure you replace the placeholder values (<...>) with your specific configuration.
Ex.
docker run \
 -td \
 --restart unless-stopped \
 --name sosrtk \
 --device=/dev/ttyUSB0 \
 -e USB_PORT=ttyUSB0 \
 -e BAUD_RATE=921600 \
 -e DATA_BITS=8 \
 -e PARITY=n \
 -e STOP_BITS=1 \
 -e PORT_NUMBER=32377 \
 -e LAT=37.7749 \
 -e LONG=-122.4194 \
 -e ELEVATION=50 \
 -e INSTRUMENT="Your GPS Receiver" \
 -e ANTENNA="Your Antenna" \
 simeononsecurity/docker-rtklib-onocoy-rtkdirect:latest
Linux - Manual Instructions
1. Install RTKBase
cd ~
wget https://raw.githubusercontent.com/Stefal/rtkbase/master/tools/install.sh -O install.sh
chmod +x install.sh
sudo ./install.sh --all release #must not be run as root
#RTKbase comes with a web element that doesn't work for our purposes.
sudo systemctl disable rtkbase_web
sudo systemctl stop rtkbase_web
or if you’re on Ubuntu specifically
sudo apt install -y rtklib
2. Set up STR2STR
- Set up USB to local TCP server
Note: When setting up USB to a local TCP server using the
str2strcommand, ensure you specify your serial settings correctly. In the provided example:
str2str -in serial://ttyUSB0:921600:8:n:1#rtcm3 -out tcpsvr://:5015 -b 1 -t 0
- ttyUSB0: Specifies the USB port. Adjust this based on your system configuration.
- 921600: Represents the baud rate. Modify this value if your device requires a different baud rate.
- 8: Indicates the data bits.
- n: Represents no parity.
- 1: Indicates one stop bit.
Make sure to customize these settings according to your specific hardware and communication requirements.
- Set Up TCP Forwarding to RTKDirect
You’ll need the IP and portnumber from the RTKDirect Console
str2str -in tcpcli://localhost:5015#rtcm3 -msg "1006(10), 1033(10), 1077, 1087, 1097, 1107, 1117, 1127, 1137, 1230" -out tcpcli://ntrip.rtkdirect.com:portnumber#rtcm3 -msg "1006(10), 1033(10), 1077, 1087, 1097, 1107,1117, 1127, 1137, 1230" -p lat long elevation(m) -i "RTKBase UM980,2.4.2 " -a "GNSS.STORE ELT0123" -t 0
Notes:
- Be sure to replace the message numbers if you know you don't use [MSMv7 RTCM3 messages](https://www.use-snip.com/kb/knowledge-base/rtcm-3-message-list/). Otherwise, don't touch them.
- Be sure to replace the values for -p, -i, and -a with your, geo cords, receiver model and your antenna if applicable. If you don’t know them, omit this information from the command.
- Elevation relative to sea level in meters.
- Use tools like gps-coordinates.net to get your coordinates and FreeMapTools to get your elevation.
- Under
-outbe sure to specify the port number the dashboard gives you.- The IP provided in the dashboard, at least for now, is the same as
ntrip.rtkdirect.com. They point to the same space.
- The IP provided in the dashboard, at least for now, is the same as
- Set Up RTKDirect STR2STR SYSTMCTL Service
To make sure that it starts up on boot, we need to create a service.
Using the commands we created earlier, you’re going to create two services. Use the commands and template below to do that.
sudo nano /etc/systemd/system/rtkdirect-str2str1.service
[Unit]
Description=STR2STR Service for RTKDirect 1
After=network.target
Wants=network-online.target
After=network-online.target

[Service]
ExecStart=str2str -in serial://ttyUSB0:921600:8:n:1#rtcm3 -out tcpsvr://:5015 -b 1 -t 0
Restart=always
RestartSec=30
StartLimitBurst=10
StartLimitInterval=5min
TimeoutStartSec=600
User=root

[Install]
WantedBy=default.target
sudo nano /etc/systemd/system/rtkdirect-str2str2.service
[Unit]
Description=STR2STR Service for RTKDirect 2
After=network.target
Wants=network-online.target
After=network-online.target

[Service]
ExecStart=str2str -in tcpcli://localhost:5015#rtcm3 -msg "1006(10), 1033(10), 1077, 1087, 1097, 1107,1117, 1127, 1137, 1230" -out tcpcli://ntrip.rtkdirect.com:portnumber#rtcm3 -msg "1006(10), 1033(10), 1077, 1087, 1097, 1107, 1117, 1127, 1137, 1230" -p lat long elevation(m) -i "RTKBase UM980,2.4.2 " -a "GNSS.STORE ELT0123" -t 0
Restart=always
RestartSec=30
StartLimitBurst=10
StartLimitInterval=5min
TimeoutStartSec=600
User=root

[Install]
WantedBy=default.target
Enable and start the services.
sudo systemctl daemon-reload
sudo systemctl enable rtkdirect-str2str1 rtkdirect-str2str2
sudo systemctl start rtkdirect-str2str1 rtkdirect-str2str2
Windows
Please see the Windows instructions for Onocoy instructions , they will be pretty much the exact same.
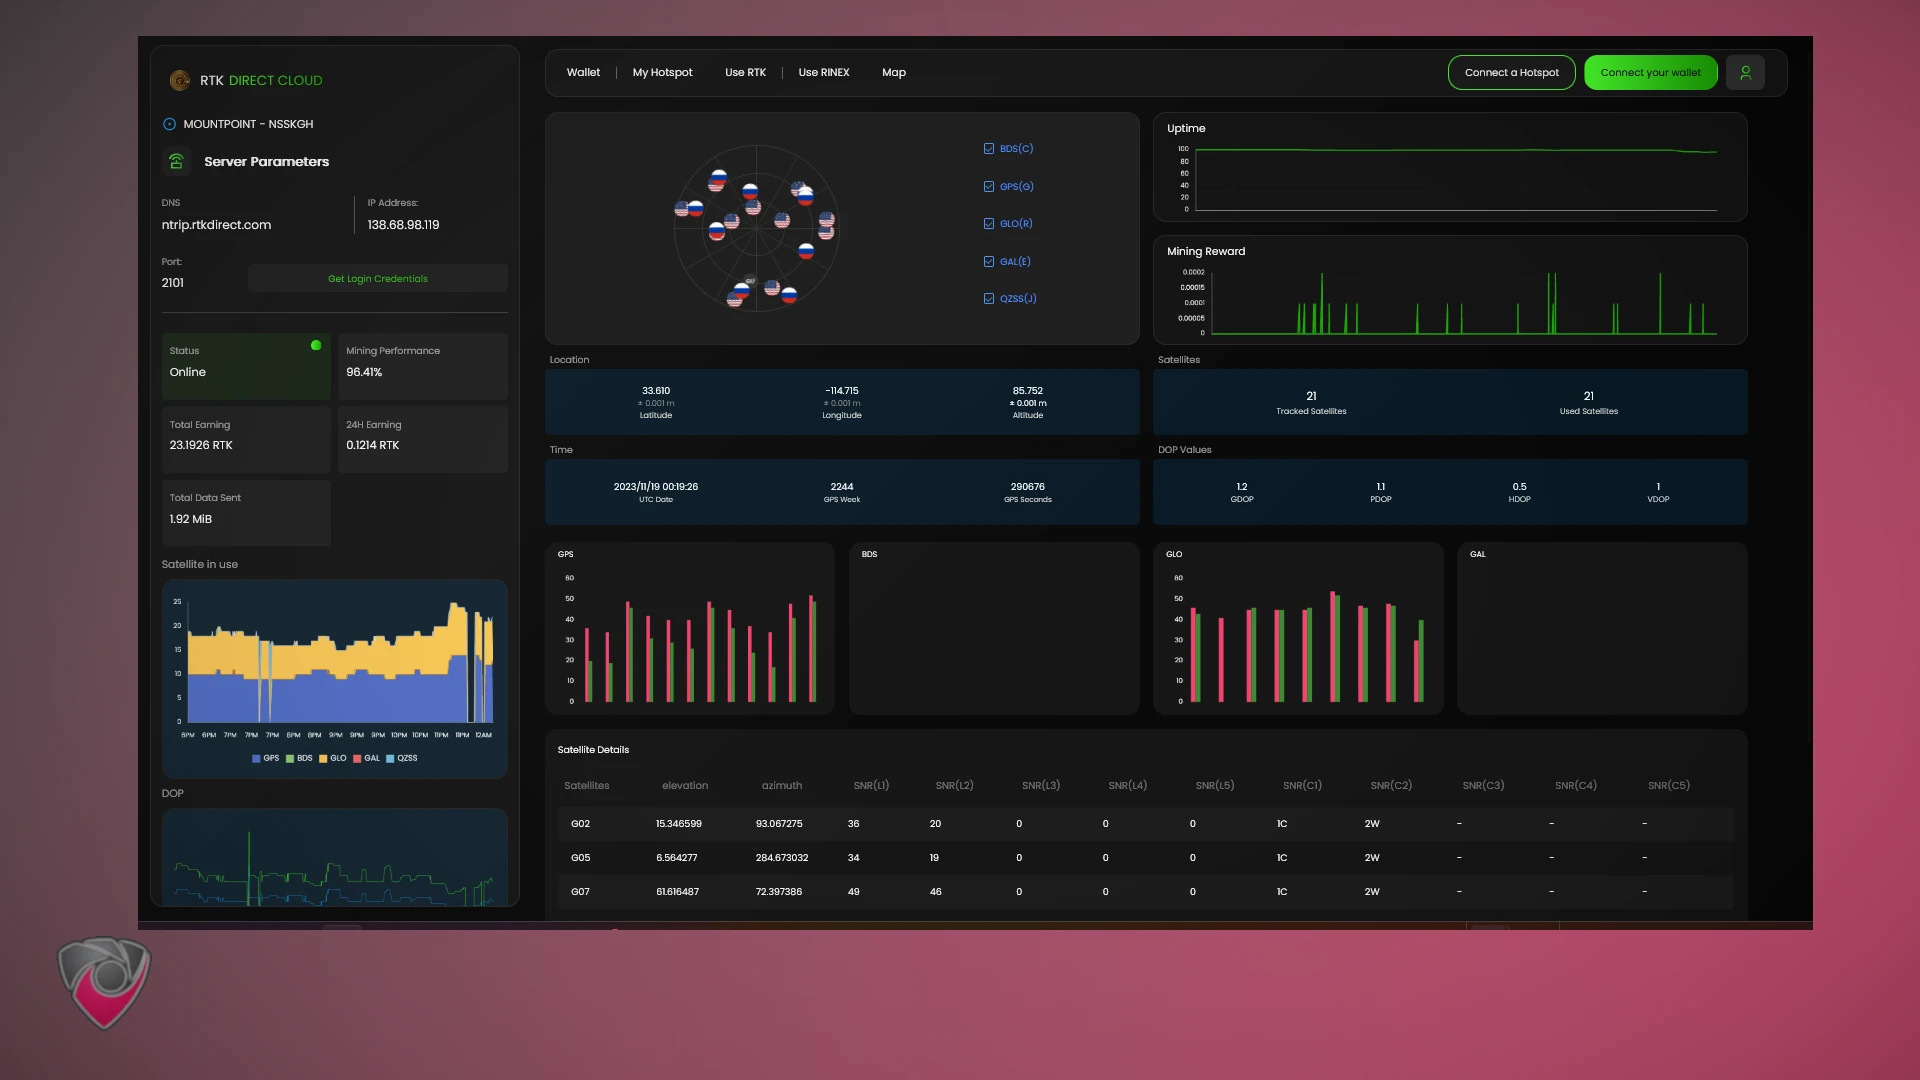
Verification:
The RTKDirect Dashboard has a few minutes of delay. For best results, you should wait 5-30 minutes before checking to see if it populates in the RTKDirect Dashboard .
Conclusion
In conclusion, establishing your DIY RTKDirect reference station opens up a world of possibilities for precise positioning and navigation. The benefits include cost-effectiveness, customization, and active participation in a global network. By following the steps outlined in this guide, you can contribute to the advancement of GNSS technology while reaping the rewards of your data contributions.
References
Disclosure and Affiliate Statement:
Affiliate Disclosure: We may earn a commission from links on this page. These commissions support our website and the content we provide. Rest assured, we only recommend products/services we believe in. Thank you for your trust! Click Here to Learn More
Related Posts


This article refers to other articles we've written:
- Quadruple Mining DePin GPS Projects: Geodnet, Onocoy, RTKDirect, and FrysCrypto
Embark on a GPS revolution! Discover DIY triple mining with Geodnet, Onocoy, and RTKDirect for enhanced precision. Join a global network and save costs. Explore the future of navigation now!
- DIY Onocoy Ntrip Server and Reference Station Setup
Discover how to effortlessly set up a DIY GPS Onocoy Reference Station for precise location accuracy. Learn step-by-step with affordable hardware options and reliable receivers.
- Unlock Precision: Build Your DIY RTKDirect Reference Station Today!
Explore DIY RTKDirect setup for enhanced GPS precision. Save costs, customize, and join a global network. Ready to revolutionize your navigation?
- Build a Profitable Passive Income Box with Low-Powered Hardware: A Guide
Learn how to set up a low-powered passive income crypto miner using a Raspberry Pi or Intel NUC, and earn $10-$20 per month per box with this guide
