Replacing Nebra Helium Miner SD Card: Step-by-Step Guide
Table of Contents
Replacing and Reimaging the Nebra Indoor and Outdoor EMMC Key / SD Card
This comprehensive guide will walk you through the process of replacing or re-flashing the Nebra Indoor and Outdoor EMMC Key/SD Card. By following these steps, you can resolve synchronization issues with your Helium Miner and ensure smooth operation. The guide provides a detailed explanation of the tools and software you’ll need, as well as the necessary steps to acquire the config.json file, flash the new SD card using Balena Raspberry Pi CM3 Image, and transfer the original config file to the new SD card.
Introduction
The Nebra Helium Miners, both the Indoor and Outdoor models, rely on the EMMC Key/SD Card for their functioning. Over time, it may become necessary to replace or re-flash this card to address syncing issues and maintain optimal performance. This guide will equip you with the knowledge and instructions required to carry out this task effectively.
To successfully replace the Nebra Helium Miner’s SD Card, you will need specific tools and software. The tools include a Phillips Head Screwdriver or Allen Key Set (depending on the model), a Micro SD Card Reader , a 64GB A2 micro SD card (or larger), and a Micro USB 2.0 Cable . The essential software needed for this process includes Balena Etcher , Balena Raspberry Pi Image, and Raspberry Pi USB Boot . With these resources at hand, you’ll be ready to proceed with the SD Card replacement or re-flashing.
Required Tools:
- A Phillips Head Screwdriver or plastic pry bar for the Nebra Indoor Miner or allen key set for Nebra Outdoor Miner
- Strong fingernails, tweezers, or needle-nose pliers to remove the old SD card
- A Micro SD Card Reader
- A 64gb (or larger) A2 micro sd card
- A Micro USB 2.0 Cable
Required software:
- Balena Etcher
- Raspberry Pi USB Boot
- Latest Nebra Image For Your Specific Device: If you don’t know what device you have, please consult the nebra documentatio n. If it’s older, it’s pretty safe to assume you have a first generation device.
Inside the Nebra Helium Miners:
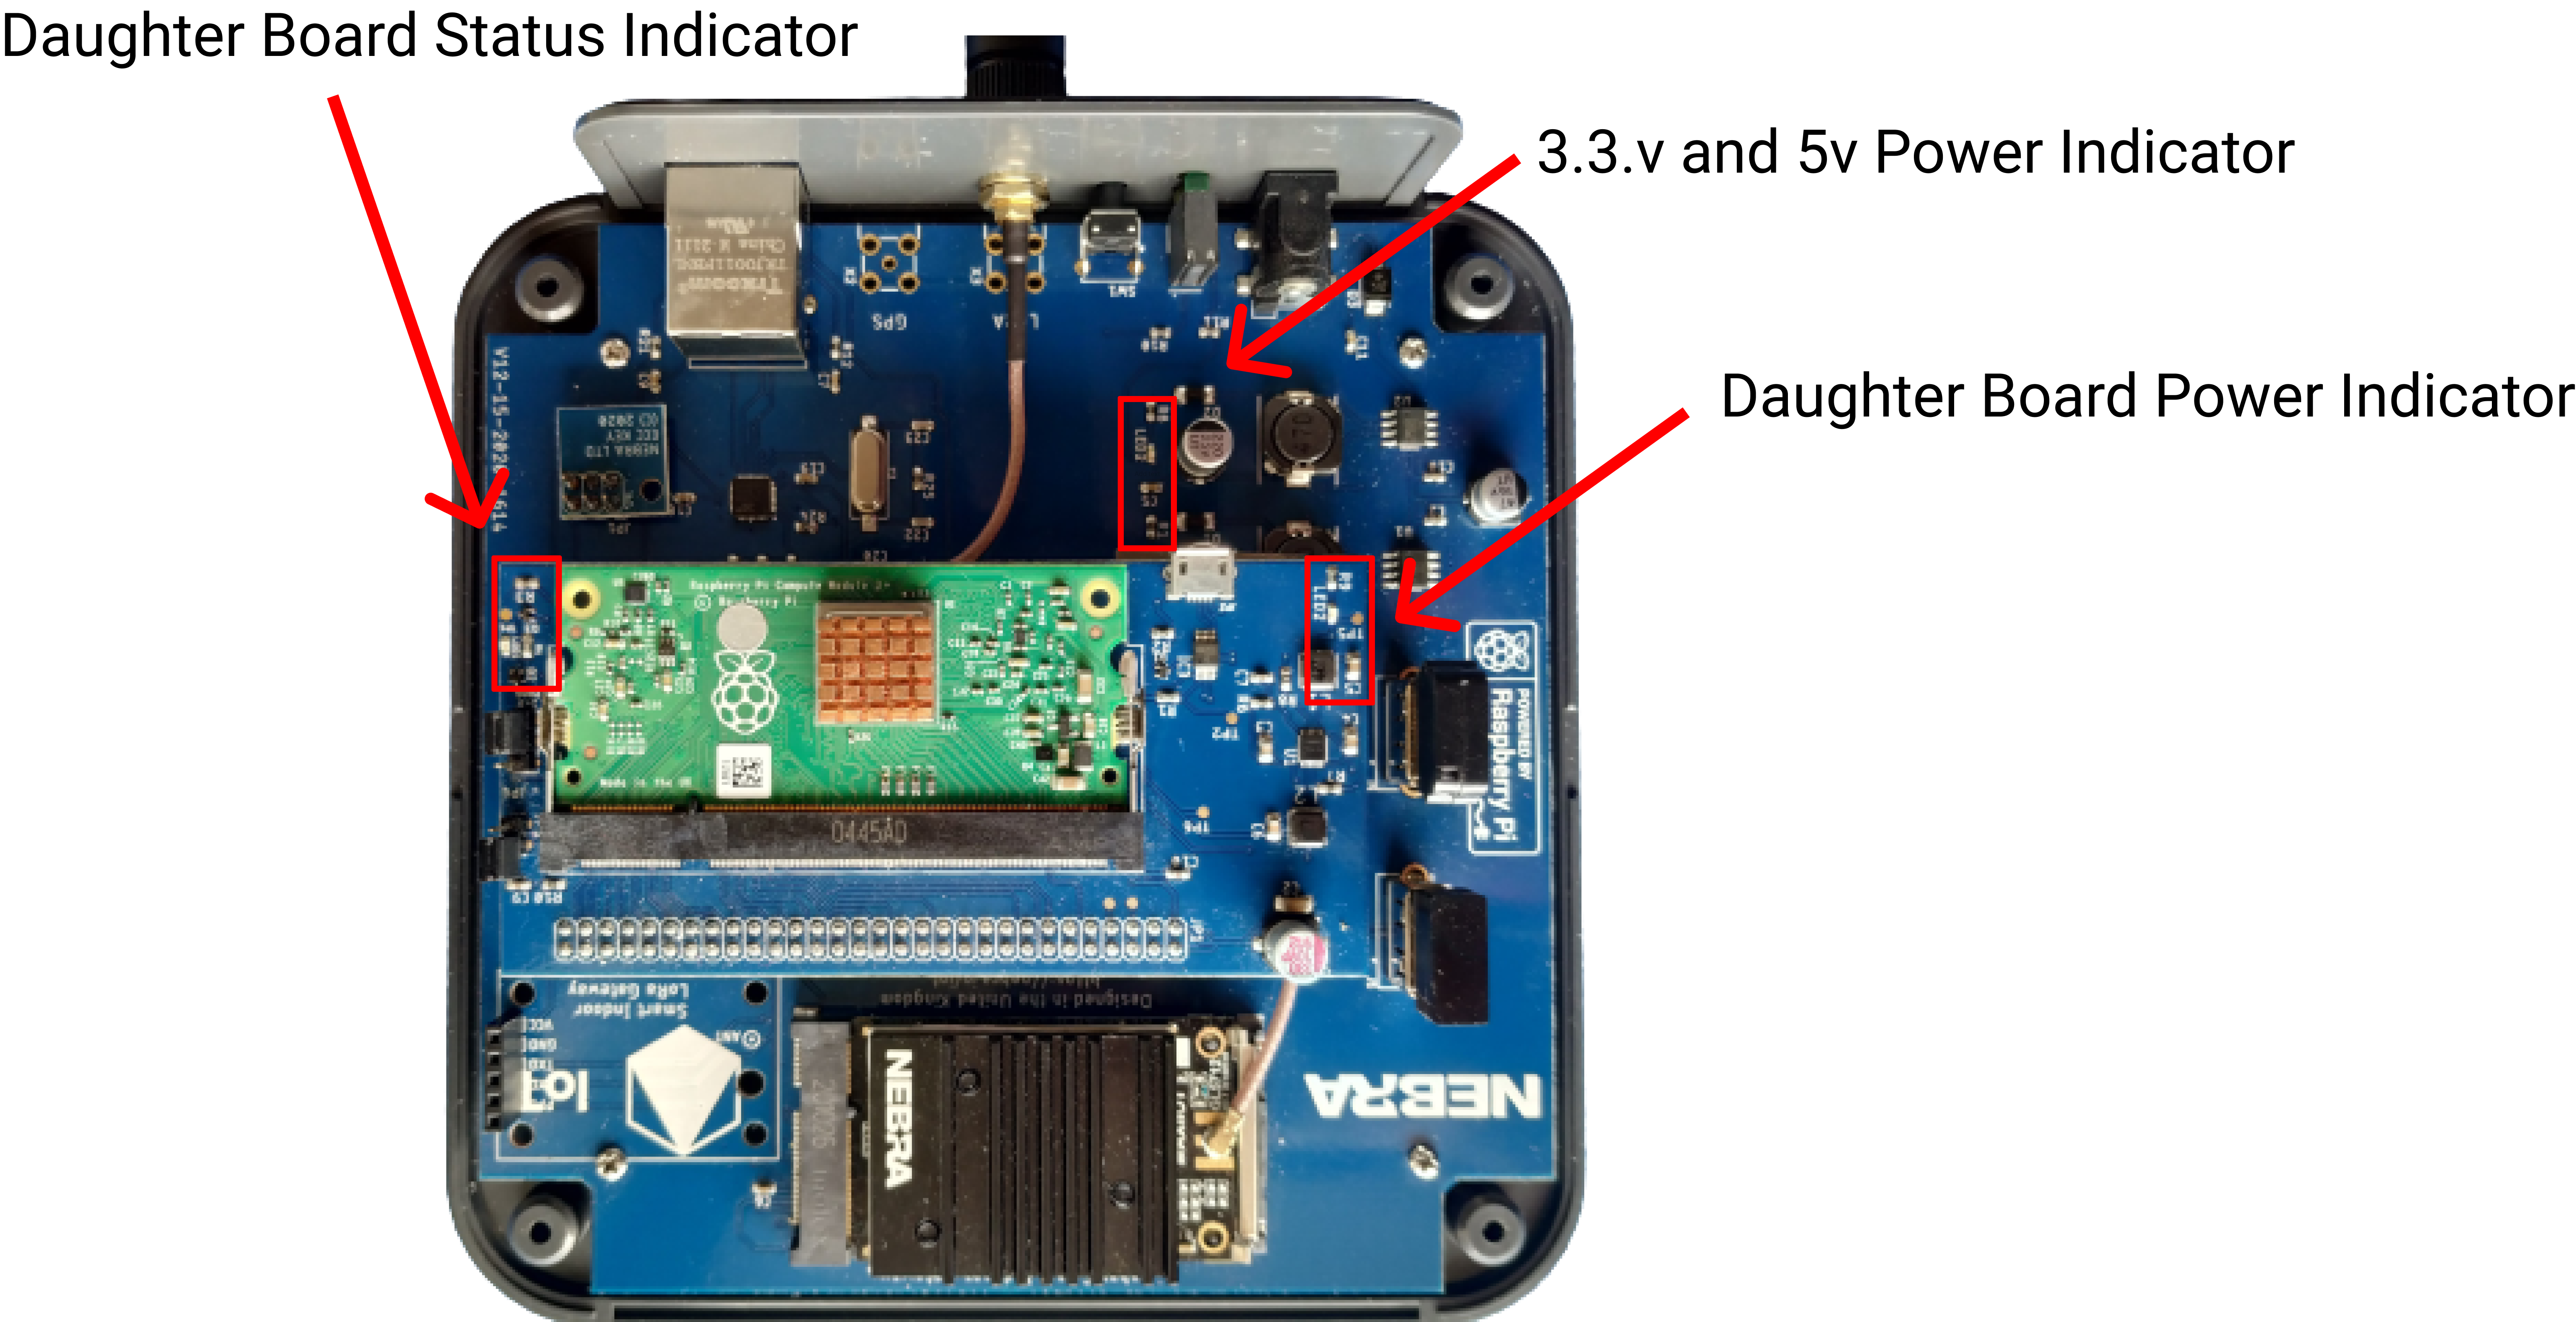
Contents of the Nebra Indoor Miner:
Contents of the Nebra Outdoor Miner:
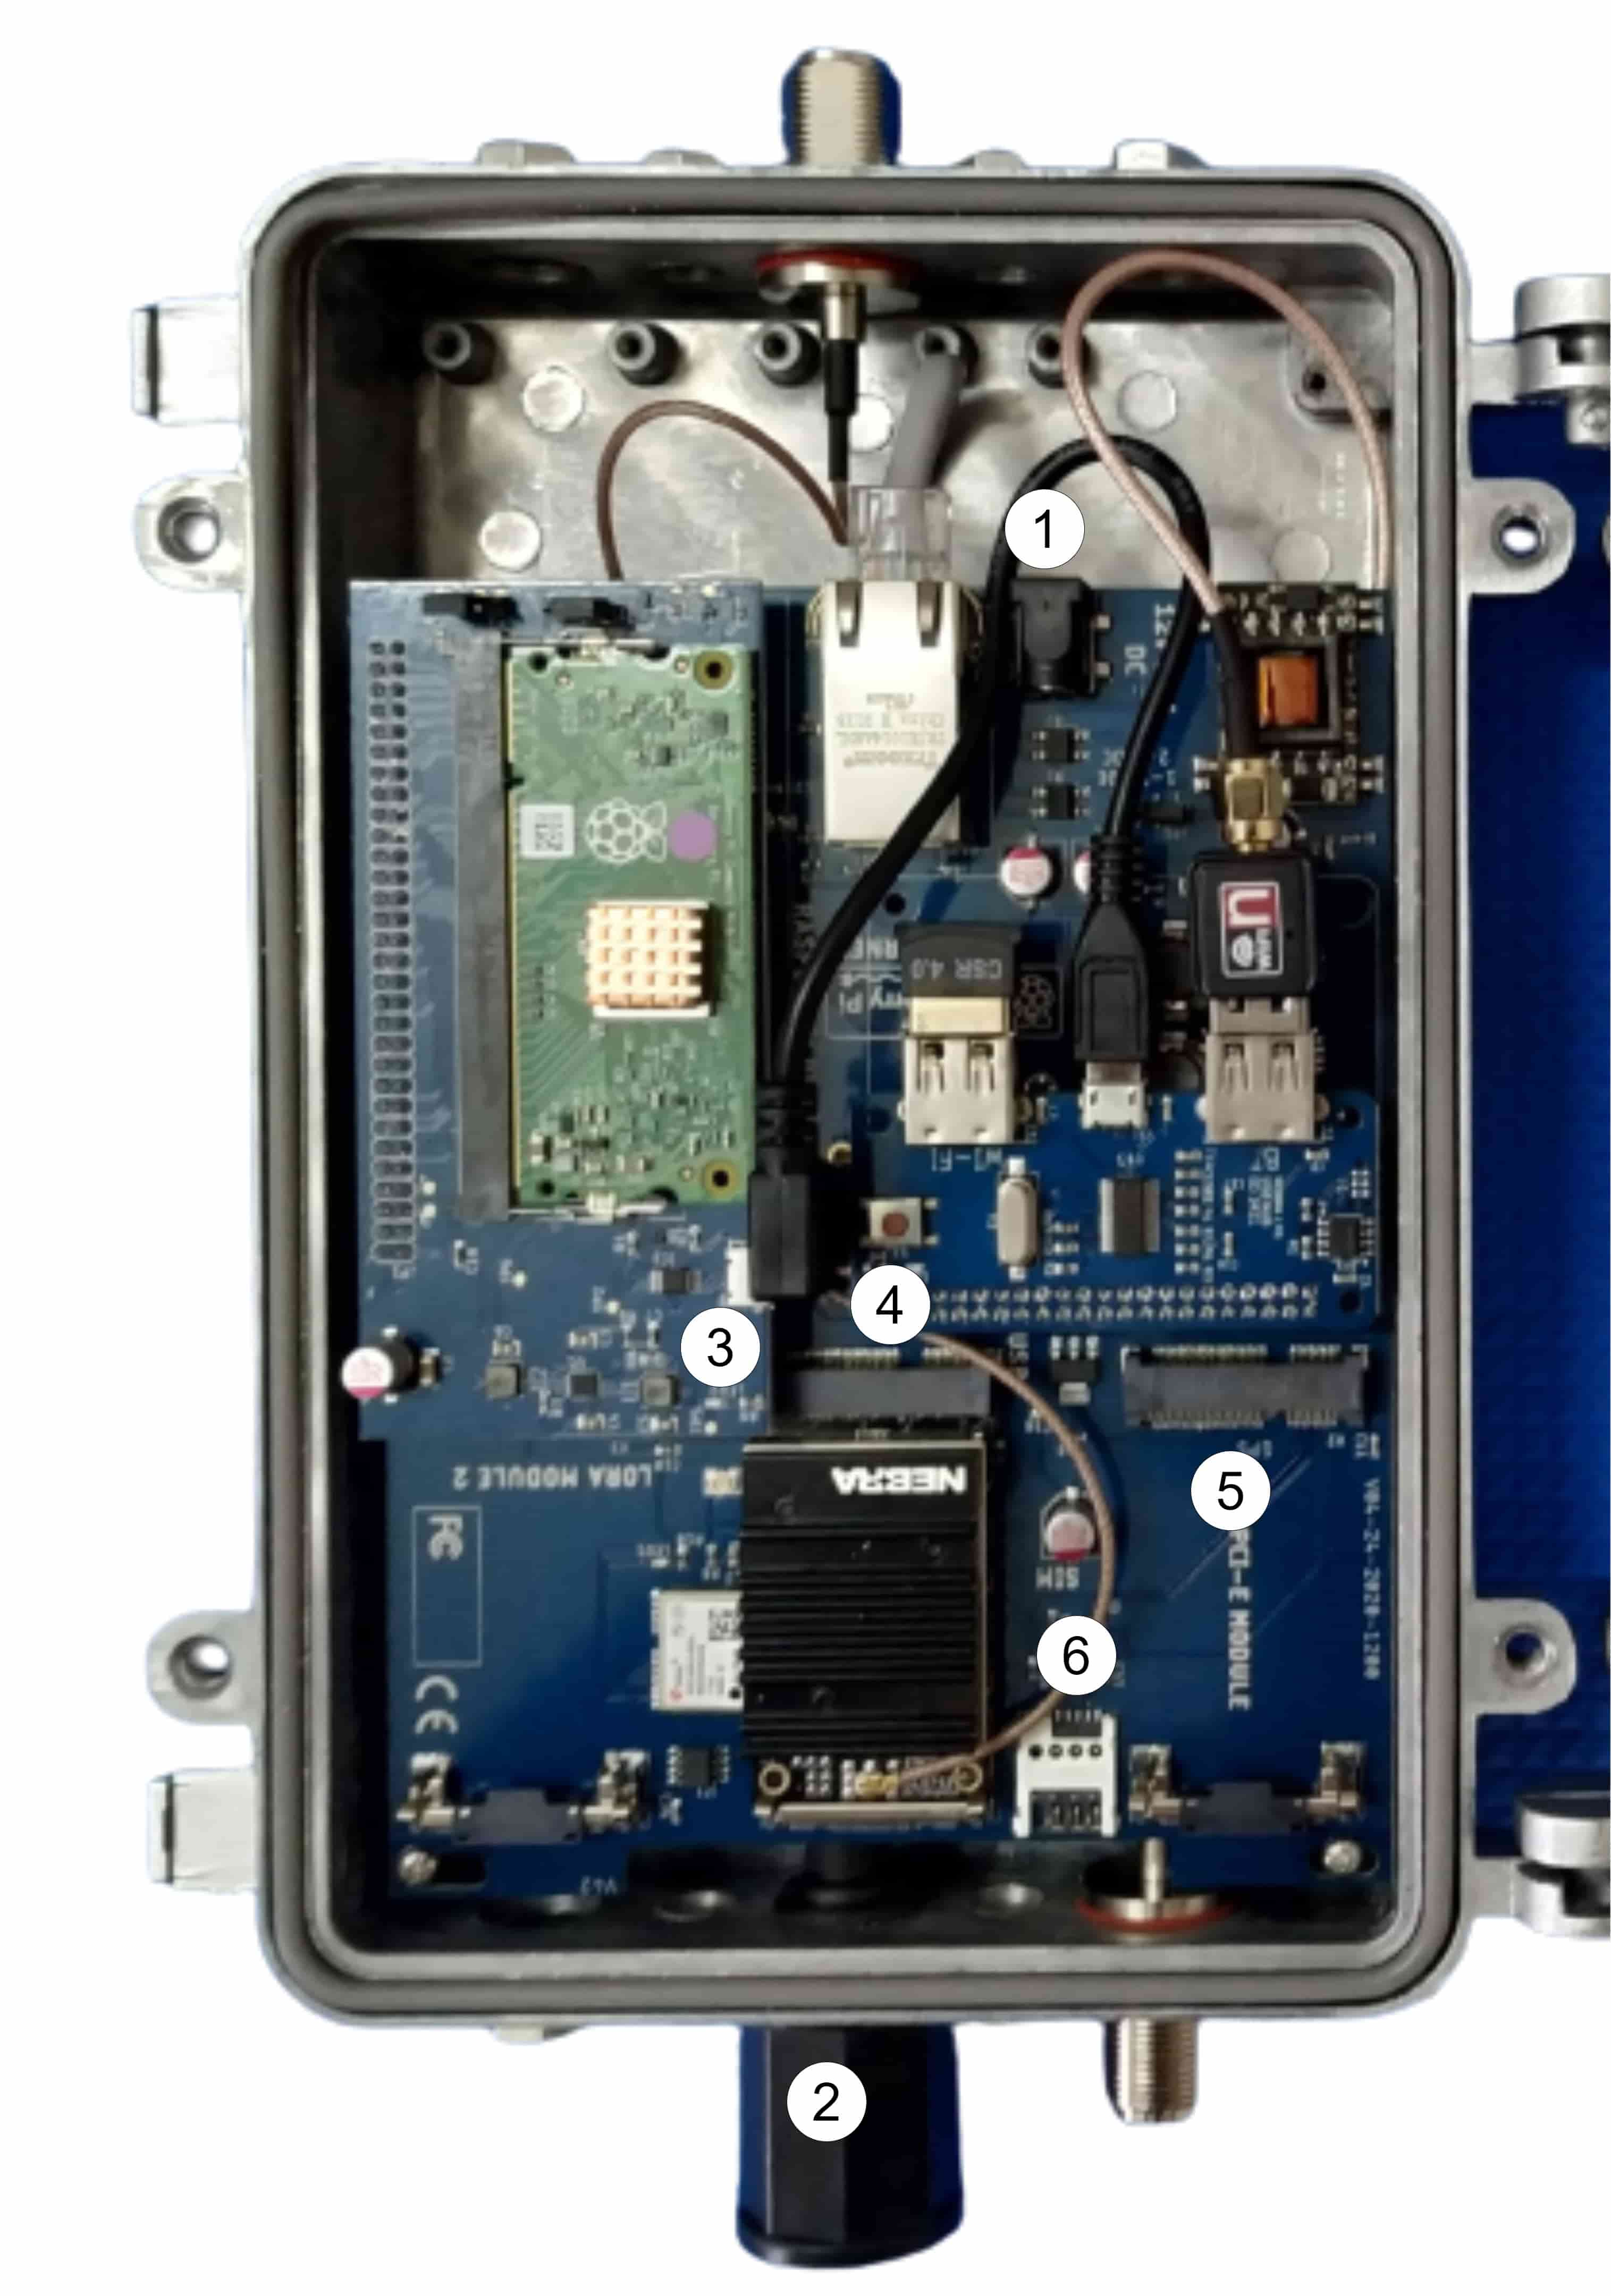
- 1.) 9-16V @ 15W DC 6.5MMx2.0MM Barrel Jack
- 2.) Ethernet Connector
- 3.) LED Indicator
- 4.) Interface Button
- 5.) 4G / LTE Module Connector
- 6.) Sim Card Slot
How to replace the SD Card
Step 1: Optionally acquire the config.json file from the EMMC Key:
- Download and install Raspberry Pi USB Boot , you’ll need this to boot the compute module as a usb file system
- Identify the and adjust jumper pins on the CM3 daughterboard for programming mode
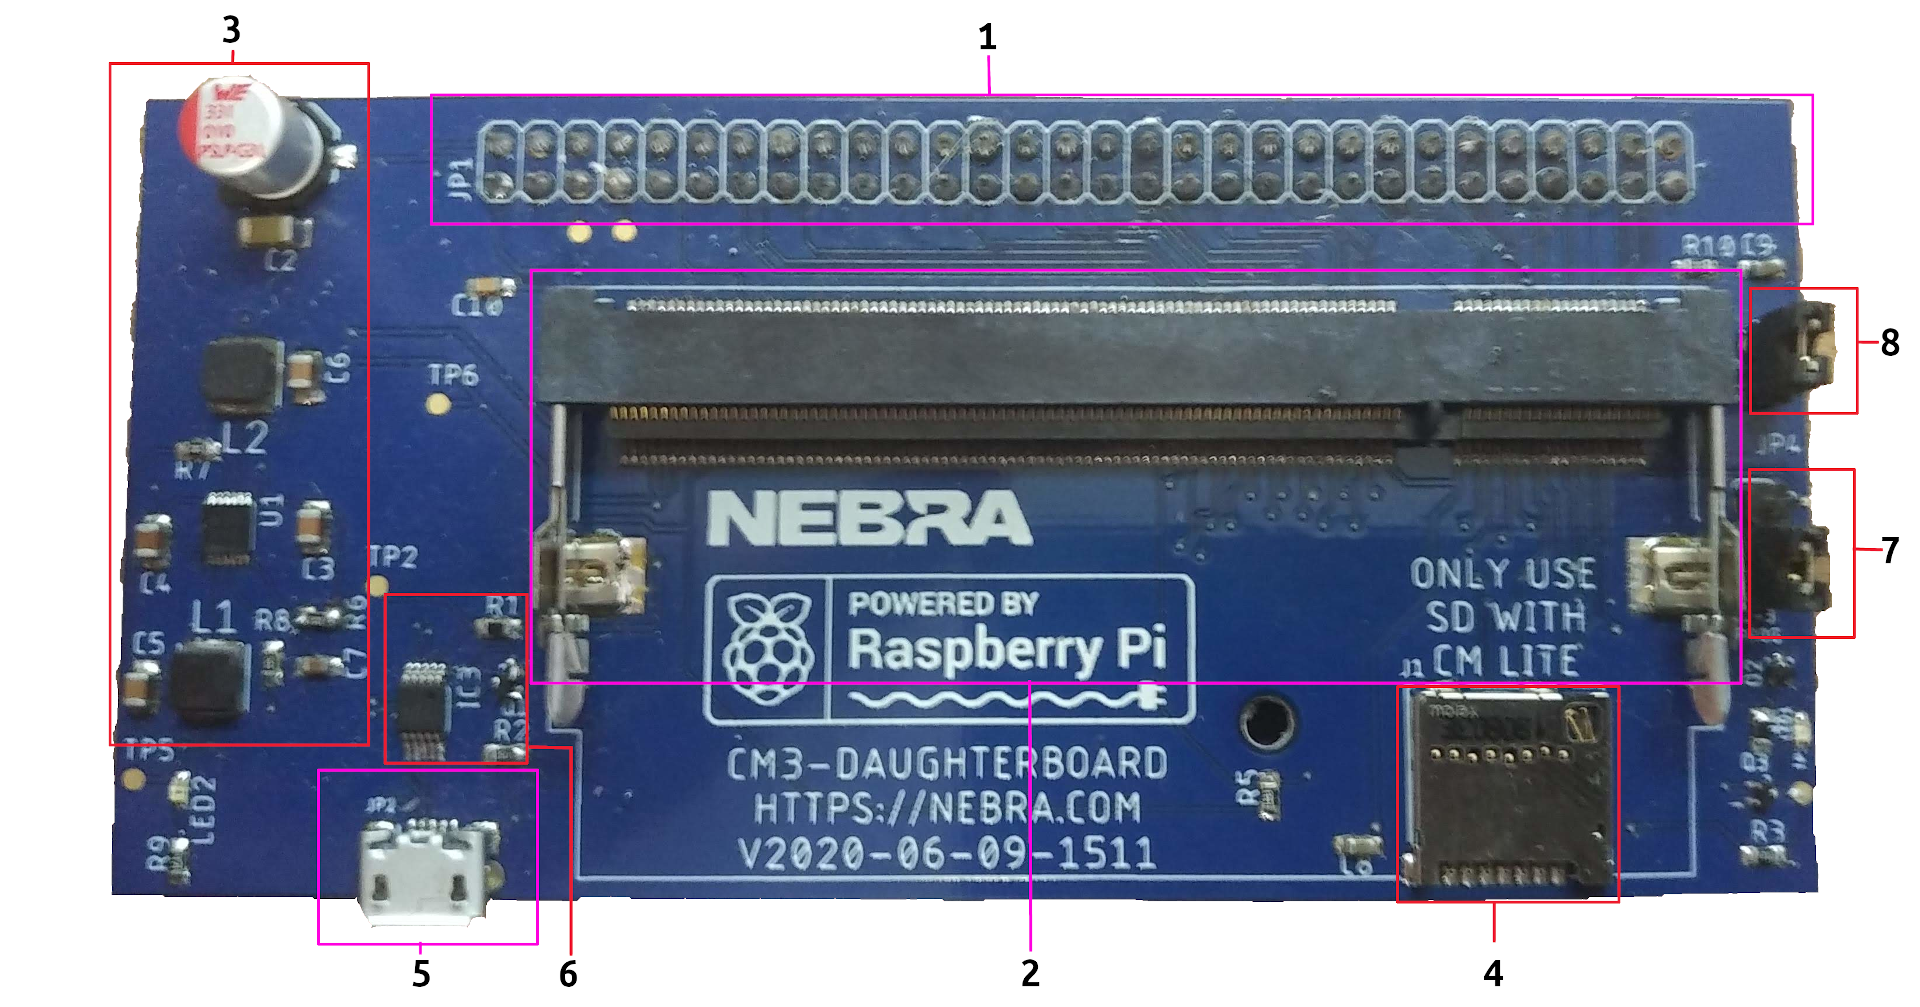
- 5.) Micro USB Port used for Imaging
- 7.) JP4 USB Jumper - Used to switch between normal operation and flash mode, ensure it is in position 1-2 for normal operation and 2-3 for programming.
- 8.) JP3 Power Jumper - Allows the module to be powered from the Micro USB connector. Only connect when programming from PC and ensure mainboard is not connected.
- Move the JP4 Jumper to position 2+3
- Plug in a usb cable and run the Raspberry Pi USB Boot utility
- Open your file explorer and you’ll see a drive called “resin-boot”. Retrieve the “config.json” file from the directory you may need that later and it should be backed up.
- Unplug the usb cable and reset the JP4 jumper to position 1+2
Step 2: Flash new sd card with the Balena Raspberry Pi CM3 Image:
- Download and extract your appropriate image
- Using Balena Etcher select the recently extracted .img file and your new microsd card as the target device
- Select Flash
Step 3: Install the new sd card and reassemble the Nebra Miner:
- Install the SD card in the slot in which the EMMC key was previously.
- Reassemble the miner
- When first powering the newly flashed Nebra Miner, plug it in with ethernet for 20-30 minutes before setting up wifi connections again.
Step 4: Profit?
Disclosure and Affiliate Statement:
Affiliate Disclosure: We may earn a commission from links on this page. These commissions support our website and the content we provide. Rest assured, we only recommend products/services we believe in. Thank you for your trust! Click Here to Learn More
Related Posts